How to Run a Virtual Classroom Online with WordPress (Tools)
Do you want to run a virtual class online? Creating an online virtual classroom may sound too technical or expensive. Or maybe you just can’t imagine it working at all.
But you’d be surprised to hear how many types of classes could go virtual. You can run a yoga class, tutor maths, show people how to cook, or almost anything else you can think of.
Luckily, there are easy tools that allow you to run a virtual classroom online without any special technical skills. In this article, we’ll be showing you how to setup a virtual classroom and teach an online class with WordPress.

Can I Create a Virtual Classroom for My Business?
Almost anything can be taught online. Just type your class’s topic into YouTube’s search bar, and you’ll likely find hundreds or thousands of videos of people teaching that skill.
One great advantage of virtual classes is that you don’t have to teach them live. You can record videos in advance if you want. That way, it doesn’t matter if it takes you several attempts to explain or show something.
In the past few weeks, we’ve seen loads of formerly in-person classes go virtual. From a one-off virtual writing retreat to a Saturday morning kids’ soccer class, instructors have been getting online.
Taking your class online could be the best thing you’ve ever done for your business. It’ll let you reach people all around the world, and you won’t be limited by how many people can fit in your classroom or fitness studio.
This isn’t just for large classes, either. You might offer a one-to-one service, like math tutoring or career counseling. Much of what we cover will work for you, too.
You can create an online classroom without a lot of tech skills or expensive tools. Here’s what you’ll need.
What You’ll Need to Run Your Class Online (Virtual Classroom)
So where do you even begin to set up a virtual class? There are a few key things you need to get into place.
To run a class online, you’ll need these 3 things:
- A website or online platform for your class. This is a place where students can find and access the class content.
- A way for students to sign up for your class.
- A way to frequently communicate with your students by email.
You’ll also likely want some of these 4 things:
- A way for students to talk and interact with each other, such as an online group or forum.
- Members-only recorded content (such as video or audio seminars) that students can work through at their own pace.
- Live video content with features like interactive polls, audience feedback, screen sharing, and audience questions.
- An LMS or membership site plugin for managing repeat payments, creating members-only content, and creating different levels of your class.
Don’t worry if that sounds like a lot. We’ll help you decide the right tools and platforms for your virtual classroom. Here’s a quick outline that you can click to jump straight to a particular section in this article.
- Creating an Online Platform for Your Class
- Getting Students to Sign Up for Your Class
- Communicating With Your Students
- Providing Somewhere for Students to Talk and Interact
- Offering Pre-Recorded Content
- Offering Live Content
- Using an LMS or Membership Site Plugin
- Final Thoughts and Best Practices
Transparency Disclaimer: WPBeginner content is reader-supported, which means if you click on some of the links in this post, we may earn a small referral fee. Please know that we only recommend products that we use ourselves and/or believe will add value to our readers. See how WPBeginner is funded for more details.
Creating an Online Platform for Your Class
It’s possible to run an online class through a private Facebook group or an email list where you link to videos you’ve posted on YouTube.
However, these aren’t great options. Not everyone uses Facebook, for instance. Also, Facebook or YouTube could decide to ban you without any fault of your own.
An alternative is to sign up for a site like Teachable. This is a popular option, but it’s definitely not free. The most basic Teachable package costs $29/month, and you’ll pay a 5% transaction fee for each student on top of that.
Instead of third-party platforms, we recommend that you create a website for your class. There are lots of ways you can do this, but the #1 website builder in the world is WordPress. Over 35% of the websites on the internet is powered by WordPress.
The best part about WordPress software is that it’s completely free. However, you’ll need a domain name and web hosting to build a website. This is required for making any type of website.
Bluehost, one of WordPress’s recommended hosting providers, is offering our readers a great deal. You can get a free domain name and web hosting for just $2.75/month for your first year. That’s over 60% off.
→ Click Here to Get This Exclusive Bluehost Deal ←
Note: If you are looking for a Bluehost alterantive, then you can also try SiteGround, another popular WordPress hosting company that’s offering a great discount for small business owners.
Once you have signed up, you will need to install WordPress. Bluehost does it automatically for you, and other hosting companies make it super easy with just a few clicks.
After you have installed WordPress, you will need to install few WordPress plugins to get your online classroom ready. Plugins are like apps for your WordPress site that lets you add essential features like contact forms, membership restrictions, etc.
We’re going to take a look at some important plugins to help you run your online class.
Getting Students to Sign Up for Your Class
You’ll need a way for students to register for your class. Even if you’re not charging for the class, you’ll want to know how many people are planning to attend. You may also want to get some information from them beforehand.
We recommend using the WPForms plugin for WordPress. It lets you create registration forms simply and easily. The lite version of WPForms is totally free, but you may want to pay for the Pro version of WPForms, so you can integrate payments with your form.
Once you’ve installed and activated either version of the WPForms plugin, you can follow WPForms’ instructions to create an event registration form.
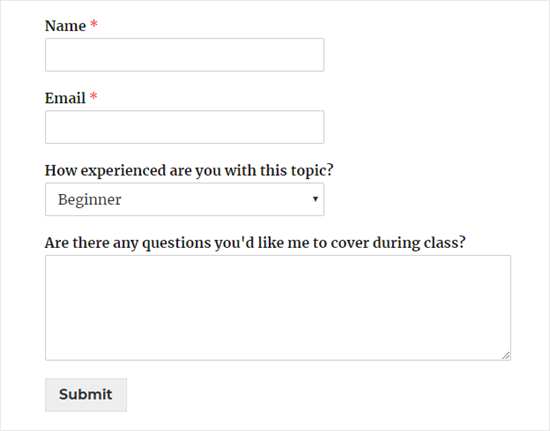
You can modify the event registration form template as much as you want. Here’s how a very simple registration form for a free class could look:
Communicating With Your Students in a Virtual Classroom
Whatever type of online class you’re running, you’ll need a way to communicate with your students.
Even if you’re just running a one-off class, you’ll still want to be able to remind students that it’s happening. You’ll also want a way to follow up, so you can let them know if you create another class.
There are lots of possible ways you could communicate with your students. You could send them messages on Facebook or WhatsApp, for instance. However, we strongly recommend using email.
Why? Because virtually everyone has email. Also, most people are used to giving out their email address when signing up for things online. Asking them for their mobile number or Facebook details will put many students off from registering.
It’s important to use a reputable email marketing service to communicate with your students. That way, you can be confident that your messages will get through to them. Also, you won’t fall foul of any anti-spam laws.
We recommend using Constant Contact. They offer a free trial and excellent support.
If you’re creating a membership site, we recommend using either ConvertKit or Drip for your email service. These tools have advanced marketing automation features that you will likely find helpful.
If you’re on a very tight budget and need a free email marketing service, that’s possible too. We recommend looking at SendinBlue or MailerLite.
All of these options are good, reliable solutions for sending bulk personalized emails to your students.
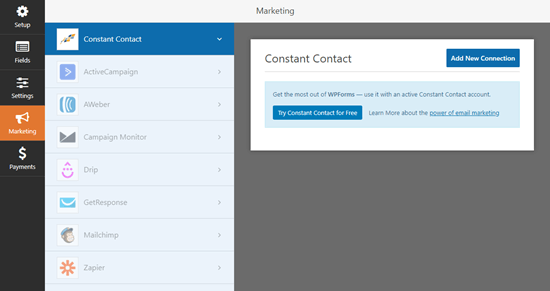
If you’re using WPForms to take class sign-ups, you can even integrate your form with your email marketing service. This means that students will be automatically added to your chosen email list when they sign up.
WPForms Lite works with Constant Contact, and if you pay for WPForms Pro, then you can choose from many other email marketing integrations as well.
Student Collaboration and Group Interactions in Virtual Classroom
Do you want your students to be able to interact with one another? If so, you’ll need to provide a straightforward and accessible way for them to do so.
There are lots of possible options here. If most or all of your students are on Facebook, then a private Facebook group could be a good option. Alternatively, you might want to create a forum on your website. We recommend using the bbPress plugin for this.

Another option is to create a private Slack channel for your students.
If you’d like students to be able to interact with one another live, you’ll want to look at how you deliver your classes. Zoom, which we’ll cover in a moment, is a great tool for interactive live video classes.
Important: If you’re running a class aimed at children, it’s definitely not a good idea to allow them to contact one another. This could create serious legal issues. You could, however, provide a space where parents of your students can interact.
Offering Pre-Recorded Content for Online Classrooms
One way to run an online class is to record content ahead of time and add it to your site. This is a good option if you’re feeling nervous or unsure about the technology involved.
You’ll need a webcam if you’re recording a video of yourself. You’ll also need a microphone. You can find our microphone recommendations in our article about how to start a podcast.
If you’re on a really tight budget, you could use your computer’s built-in microphone and webcam. However, higher quality equipment will definitely help you produce a more professional class recording.
You may also want to record your screen, perhaps to show PowerPoint slides. You can do this using specialist screen recorder software, or you could run a Zoom call and record it. We’ll cover more on Zoom in a moment.
Pre-recorded content is a great option for a class that you want to run over and over again. You can create it once and sell it an unlimited number of times. Students can easily take the course at their own pace.
When you put your content on your website, it’s very important not to host your videos yourself. If hundreds of students want to watch it at once, then this might slow down or even crash your website.
Instead, you should use one of our recommended free video hosting sites. That way, you can simply embed the video on your site, so students can watch it there without taking up your site’s valuable resources.
If you want to password protect your content or restrict it to members only, then we recommend creating a membership site. This also lets you charge different amounts for different levels of access.
Offering Live Content in Online Classrooms
You may want to teach your class live. This could work really well for a class that you used to teach in-person and are now taking online.
For live classes, we strongly recommend Zoom. It’s a tool that lets you host video calls with as many people as you want. The free plan gives you access to loads of features, with the one key restriction that your calls can’t be longer than 40 minutes.
You can schedule meetings in advance and send out an invite to your students. They can click a special link to sign in on their computer, or they can use the Zoom app on their phone.
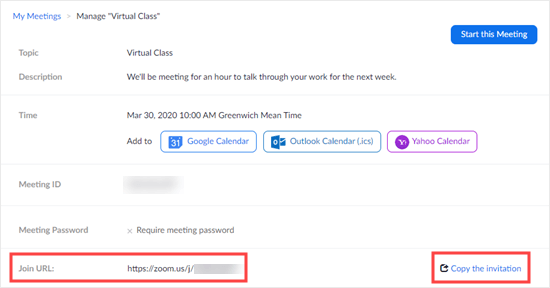
Zoom has lots of useful options. For instance, you can use it to share your screen with students. This means you can show PowerPoint slides or demonstrate an online process.
You can even use Zoom to present using an iPad, and then you can combine with the Notability app to create visual notes as you go along.
Zoom lets you see your students, too. They can dial in with their cameras on, if you want. They can also talk to you live, though you can mute them!
We recommend that you mute everyone by default while you’re teaching your class. You can let students ask questions at the end.
There’s also a text chat feature in Zoom, which students can use to interact with one another while you’re teaching. You can even poll your students to find out what key topics they most want you to cover.
You can also record Zoom calls. This means you can run a live class plus recordings that you offer for students who can’t attend live.
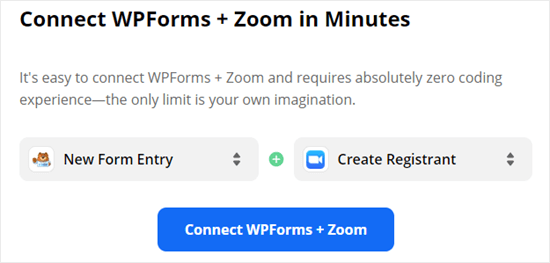
The paid version of Zoom lets you run webinars, too. You can integrate your WPForms registration form and Zoom using Zapier. This lets you automatically sign people up for the webinar when they register for your class.
Using an LMS or Membership Site Plugin
Do you want to turn your website into a virtual classroom? Or perhaps you want to lock content to make sure that only paid-up members can access it?
You’ll need to pay for this functionality, but it could well be worth it if you’re running a series of classes. Using your site as a learning platform works well for classes that last more than a few weeks.
For instance, you might be running a 12 week class. Students need an easy way to refer back to the earlier weeks’ material, and that will be tricky if you simply send out all the content by email.
With an LMS (Learning Management System) solution, you can even offer quizzes and grade students’ performance. You’ll need an LMS plugin for WordPress.
Our top recommendation here is LearnDash. It lets you create as many different courses as you like, with lessons, topics, quizzes, and categories. You can schedule lessons to be released over time, if you want.
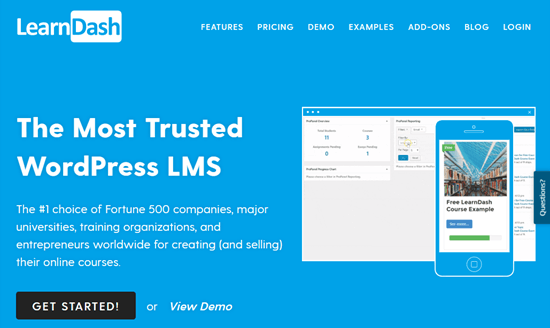
With LearnDash, you can also offer quizzes and tests for your students. You can even set assignments that you can approve and comment on. It also lets you create course-specific forums where your students can interact.
For more details, see our guide on how to create an online course with WordPress.
What if you don’t want a whole learning environment, but instead you want to lock content on your site? You can do that with a membership site plugin.
We recommend using MemberPress as your membership site plugin. It’s easy to set up and has powerful access controls. You can restrict access not only to posts and pages but also to specific categories, tags, files, and more.

You can use MemberPress to “drip” content to your students. This means they only get access to certain content after they’ve been a member for a specified period of time. You can even integrate it with LearnDash if you want.
For more details, see our ultimate guide on how to create a membership site.
Final Thoughts and Best Practices
We know there’s a lot to consider when setting up a virtual class. You can set up a simple class for free on your WordPress site. You’ll only need to pay for your website domain name and web hosting, which doesn’t need to cost much.
Make sure you use a reputable email marketing service to contact your students. We recommend Constant Contact, which has a free trial. If you want a fully free solution, try SendinBlue or MailerLite. You can even use email as a simple way to deliver class content.
If you want to teach on live video or through screen sharing, then Zoom is a great option. The free level offers a really generous set of features.
To run an ongoing class through your website, you’ll want an LMS or membership site plugin. We recommend LearnDash as the best LMS plugin, and MemberPress as the best membership site plugin.
We hope this article helped you learn how to run a virtual classroom with WordPress. You may also want to see our guide on the must have WordPress plugins for all websites.
If you liked this article, then please subscribe to our YouTube Channel for WordPress video tutorials. You can also find us on Twitter and Facebook.
The post How to Run a Virtual Classroom Online with WordPress (Tools) appeared first on WPBeginner.


No comments