How to Add or Remove Capabilities to User Roles in WordPress
Do you want to add or remove capabilities to user roles in WordPress?
WordPress comes with a simple but powerful user management system. Each user has capabilities based on the roles they are assigned.
In this article, we’ll show you how to modify user roles in WordPress by adding or removing capabilities from user roles.
Why Add or Remove User Role Capabilities in WordPress
WordPress comes with a built-in user management system and some predefined user roles and permissions.
As an Administrator, you have the ability to perform any action on your WordPress website. For instance, you can add or remove new users, install plugins and themes, delete content, and more.
If you run a multi-author WordPress blog, then you can add other users with Editor, Author, or Contributor user roles. This gives them user role permissions to add new content, but they cannot do administrative tasks.
WordPress also comes with a Subscriber role so users can log in to your site and manage their profiles.
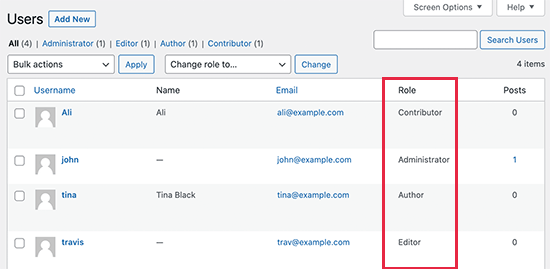
Similarly, WordPress plugins can also create user roles with custom permissions. For example, eCommerce plugins can create a user role for customers with specific custom permissions, or a membership plugin can create its own custom user roles for members.
But what if you wanted to give a user role certain extra permissions or take away some existing permissions?
For instance, you may want to take away publishing permission from the Author user role, or allow Authors to edit other user’s blog posts.
What if you wanted to create a totally custom user role with limited capabilities?
That being said, let’s take a look at how to easily modify user role capabilities in WordPress and create custom user roles with specific permissions.
Add / Remove User Role Capabilities in WordPress
The first thing you need to do is install and activate the Members plugin. For more details, see our step by step guide on how to install a WordPress plugin.
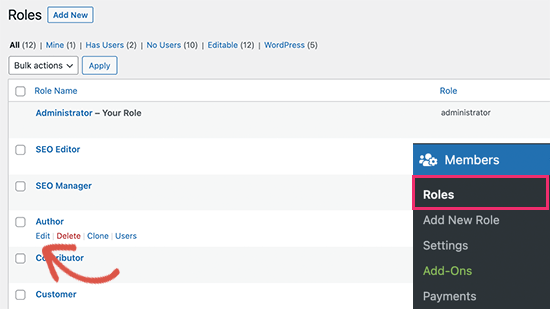
Upon activation, you need to visit the Members » Roles page and click on the Edit link below the user role that you want to modify.
This will open the user role editor where you will see different sections in the left column and available capabilities to the right.
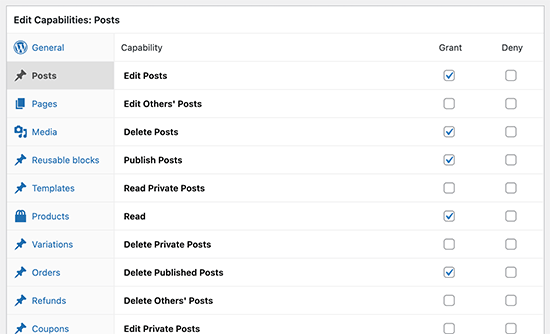
You’ll notice two checkboxes to Grant or Deny the permission next to each capability.
If a user role is granted permission that you want to take away, then you need to uncheck the Grant option and check the Deny box.
For instance, if you want to prevent the Author user role from publishing blog posts, then you need to switch to the Posts section and then check the Deny box next to the ‘Publish Post’ option.
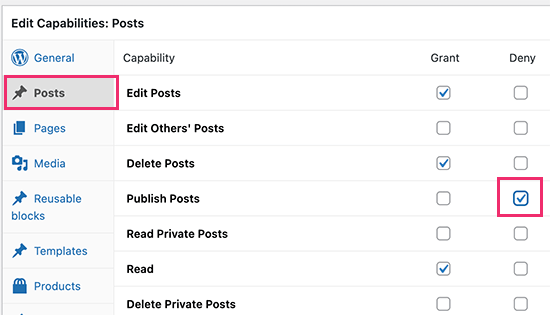
Similarly, you can also give additional capabilities to a user role.
For instance, let’s suppose you want to allow users with the Author user role to be able to moderate comments as well. By default, the Author user role does not give users permission to moderate comments.
To do that, you need to switch to the ‘General’ section and check the Grant box next to the Moderate Comments option.
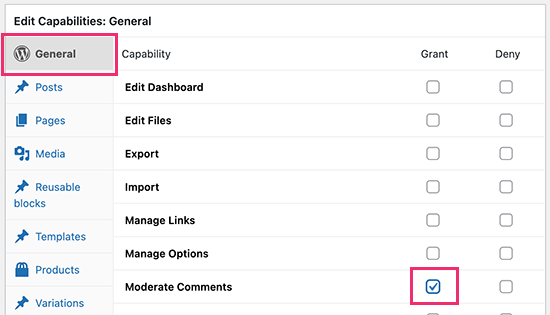
Don’t forget to click on the ‘Update’ button to save your changes after you are done modifying a user role.
You can now create a new user account with that particular user role and log in to make sure that your customized permissions are working as you intended.
Adding A New User Role with Custom Permissions
The plugin also allows you to create custom user roles where you can select which permissions and capabilities the role would give to the users.
Let’s suppose you have a ‘Movies’ custom post type on your website and you want some users to be able to add movie reviews there. However, you don’t want them to edit any other section.
To do this you’ll need to create a custom user role.
Simply go to Members » Add New Role page. First, you need to provide a title for the custom user role.
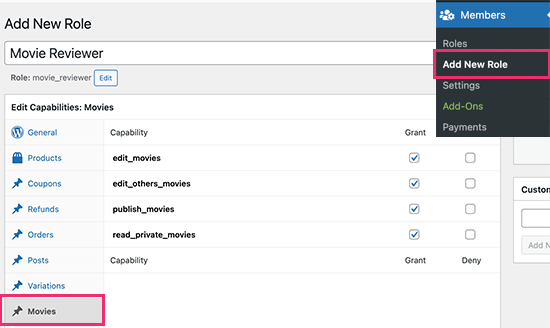
After that, you can switch to the section where you want to grant the user the capabilities. For instance, we have a section called Movies for our custom post type on our test site.
There you can give users the permissions to edit and publish content for that post type.
After that, you can review other sections too and see if you want to give users capabilities to do anything else on your site.
Once you are finished, don’t forget to click on the Add Role button to save your changes.
You can now add a new user to your website and assign them the custom user role you just created.
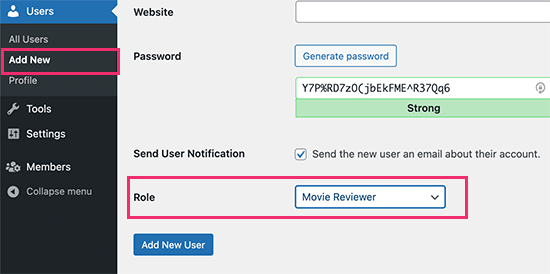
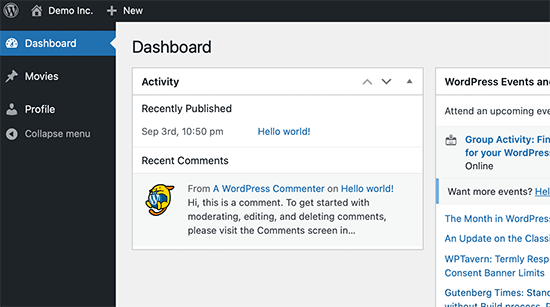
After that, you can log in with that new user account to make sure that everything is working fine. Here is what our custom user role dashboard looked like:
Securely Managing User Accounts in WordPress
Customizing WordPress user roles and permissions allows you to control user access to the admin area of your WordPress website.
However, it also opens up your site to hacking attempts and vulnerabilities. Following are a few things that you can do to make sure that only users with access can securely log in to your WordPress website.
1. Enforce Strong Passwords
WordPress includes a strong password generator by default, but users can skip it. You can add a password policy manager to ensure all users are using a strong password.
2. Enforce Two-Step Authentication
Two-step authentication asks users to enter a one-time code to login to their account in addition to their password. Users can generate this code via an authenticator app on their computers or phone.
For more details, see our guide on how to add two-step authentication in WordPress.
3. Install a WordPress Security Plugin
WordPress security plugins help protect your website by monitoring it for suspicious activity and login attempts. We recommend using Sucuri, which is the best WordPress security plugin on the market.
We hope this article helped you learn how to add or remove capabilities to user roles in WordPress. You may also want to see our guide on how to get a free email domain, or our comparison of the best business phone services for small business.
If you liked this article, then please subscribe to our YouTube Channel for WordPress video tutorials. You can also find us on Twitter and Facebook.
The post How to Add or Remove Capabilities to User Roles in WordPress appeared first on WPBeginner.


No comments